Adding and Editing Evaluation Channels
myTIPreport comes pre-loaded with the most commonly used evaluation channels for each specialty. If your group is only going to use a subset of the channels to gather feedback, we recommend disabling the unused channels. Further, if you have additional evaluation forms that you'd like to upload, you can do so by adding forms to existing channels or adding a new evaluation channel.
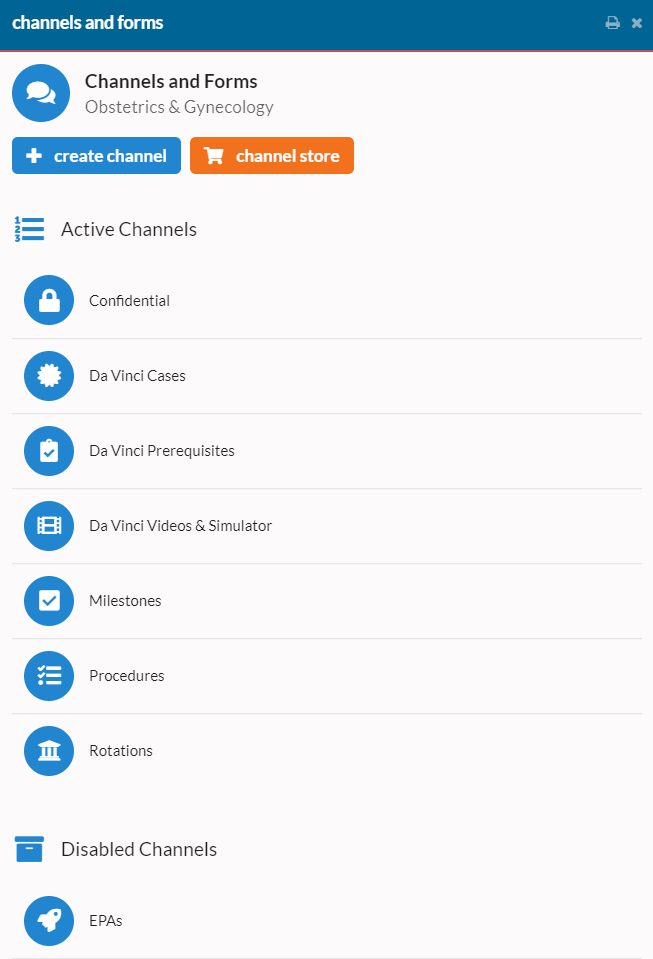
To customize any piece of your evaluation experience, log into the website, select the admin menu option and click on Evaluation Channels and Forms under Evaluation Customization. From there you'll see a list of your active channels along with any that you've disabled:
Adding a New Evaluation Channel
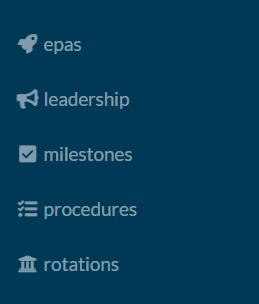
A set of related evaluation forms or assessments is grouped together in a "Channel". Each channel gets an entry in the menu in the web and on the phone. For example, each entry in this list is an evaluation channel:
Whether you're looking to create a single evaluation form, or a bunch of related evaluation forms, you'll want to start by creating a new channel. To do that, in the Evaluation Channels and Forms view, click on the blue create channel button.
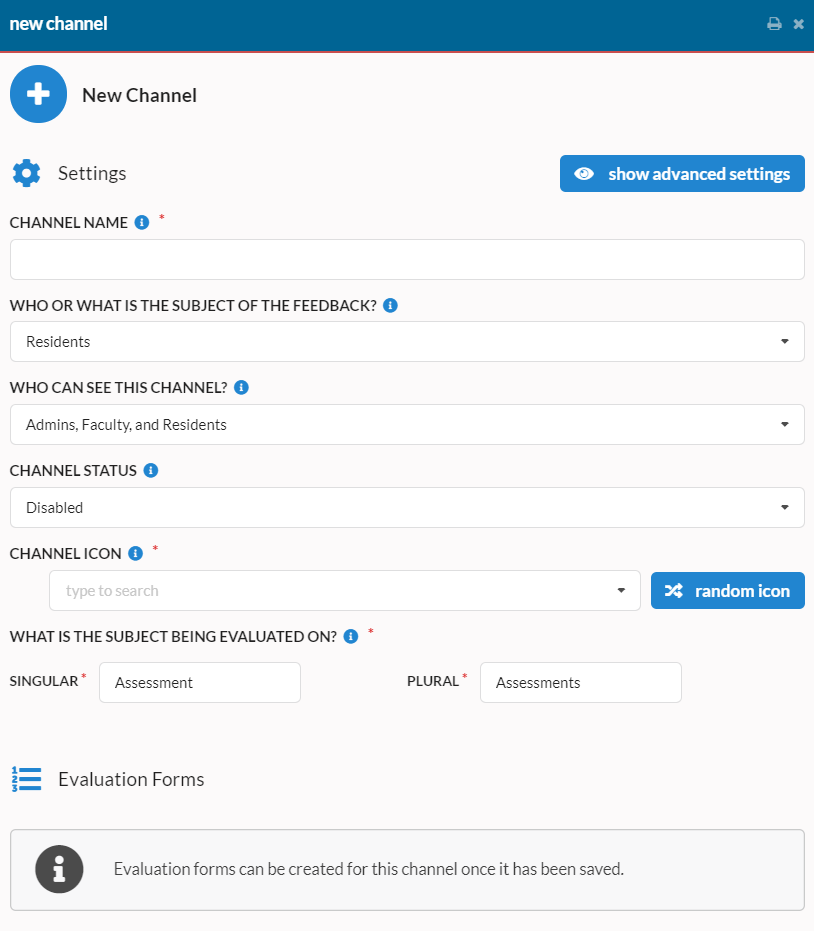
To create the channel, fill out each of the fields and press save. Here's a brief discussion on each of the fields:
Channel Name
This is the name of the channel. This name is what will show up in the menu list for channels (as seen above).
Who Or What Is The Subject Of The Feedback?
There are currently two options for this:
- Residents (or, depending on your program, Fellows, Students, Trainees, etc.)
- Faculty (or, depending on your program, Trainers, Teachers, Proctors, etc.)
- The Program
The most common choice here is "Residents". It allows for feedback on the learners in your program. Most of the default channels (Procedures, Milestones, Rotations, etc.) have the value of "Residents" so if you're looking for a channel similar to those, choose "Residents".
The "Faculty" option allows for gathering feedback on your faculty members. Examples of this include feedback related to how a given faculty member teaches, presents, or conducts themselves. By default, Residents are the only group of people who can submit feedback in a channel of this type and feedback is anonymous.
"The Program" option allows for gathering feedback where the feedback is on the program itself. Examples of this include feedback about a Rotation, feedback about a Service, or possibly feedback about a new set of policies that the program has put in place. Feedback in this channel type can be provided by learners, teachers, or both (more on that in the next section). The feedback received is only visible to administrators.
Evaluator Privacy
This option controls what information about the person submitting the evaluation is captured. There are two options:
- Anonymous - Evaluator Identity is Hidden. This means that the evaluators identity is hidden from both the person receiving the feedback as well as administrators.
- Not Anonymous - Evaluator Identity is Visible. This is the default option and means that the person receiving the feedback, and administrators, will be able to tell who submitted the feedback.
There are two important points worth mentioning about anonymous evaluations. First, any time someone fills out an anonymous evaluation, they will see an auto-generated message at the top that explains that their name will not be associated with the feedback:
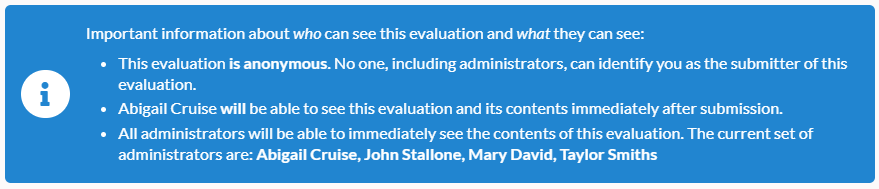
Next, feedback from an anonymous evaluation form will not count towards the leaderboard. This is due to the fact that accumulating publicly-visible points for an anonymous evaluation could compromise the anonymity of the evaluator in certain situations.
Who Can See This Channel?
This defines the set of users who can see and interact with the evaluations in this channel. If a channel is visible to a user, their access to evaluation data is still governed by the general permissions rules.
Channel Status
Indicates whether or not the channel is active. Disabled channels are hidden from everyone and do not send automated requests.
We recommend that new channels be created in the disabled state and then enabled once all of the evaluation forms have been configured.
Channel Icon
This is the icon that appears next to the channel name in menus and headers. The goal with picking an icon is for each channel have a unique icon so it easier to identify the type of an evaluation and the context of the view that a user is in. Don't worry about finding the "perfect" icon for your channel as it may not exist. If you're stuck, just click the "random icon" button until you find something that is unique and reasonable.
What Is Being Evaluated
This describes the activity or competency being evaluated. This often matches the name of the channel. For instance, for the "Procedures" channel, the singular value would be "Procedure" and the plural form would be "Procedures". We use these values when constructing lists, headers, or sentences that are related to the evaluation forms in this channel.
If unsure, we'd recommend going with either "Activity" and "Activities" or "Competency" And "Competencies". Or, if this channel will only have a single evaluation form, we'd recommend going with "Assessment" and "Assessments" or "Evaluation" and "Evaluations"
Saving and Adding Evaluation Forms
Once you save your channel, you'll have the ability to add evaluation forms. Note that the new channel will not be visible to anyone else until its status is changed to Active and saved again.
For a discussion on adding and editing forms, see our help topic here.
Modifying or Hiding an Existing Channel
To modify an existing channel, in the Evaluation Channels and Forms screen, click on the channel you'd like to modify. From there, make any updates you'd like and click Save Changes.
Hiding or Showing a Channel
To hide a channel, change it's status to disabled. To show a channel that is currently hidden, change its state to Active. Once you've made the desired changes, click the Save Changes button that shows at the bottom.
When a channel is hidden, none of its data is lost. The data is just hidden. The data can be viewed again by simply re-enabling the channel.
Learner-Level Logic
Learner-Level Logic allows you to control whether or not learners see a channel based on their current level. To control this, click on the show advanced settings button and find the section that looks like this:
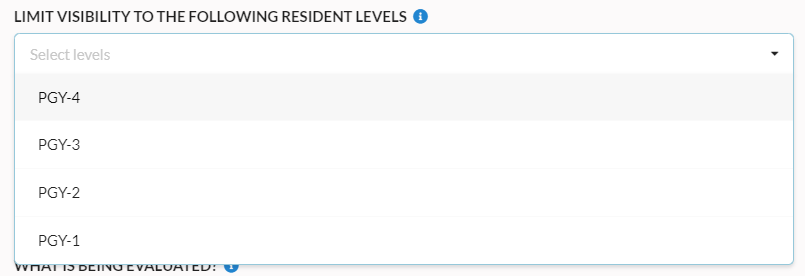
This control allows you to select multiple classes. When finished, click off of the control to close it and then press the Save Changes button that appears at the bottom.